Efficient Revit with Templates and Families
We all know Revit is a great tool for creating coordinated drawings and models. Instantly updating all drawings and schedules the moment changes are made is one of the main reasons for using Revit. Coordinating section, elevation and detail drawings automatically with the relevant sheet numbers, instant schedules that can be edited and changes reflected in drawings, etc. are all great productivity features that Revit delivers as a matter of course.
Project Templates
There are some things that are quite laborious, that a good project template can help with. Creating a project template is one of the first tasks in adopting Revit. As a minimum this will mean creating and loading Title block families to personalize the sheets, along with text and dimension types for annotation to match company standards. Adjusting line weights and object styles to help produce nice drawings with the minimum of overrides is also high in the list of tasks in creating a new template.
A little more involved, but worthwhile, is creating bespoke section, elevation and detail callout markers, along with grid bubbles and level markers. All these things personalize Revit drawings and help get away from the ‘all Revit drawings look the same’ accusation.
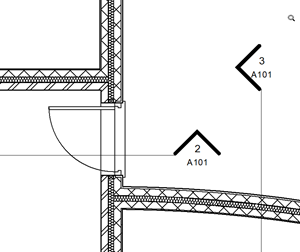
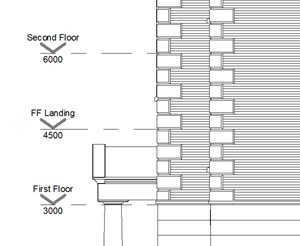
Personalised Section and Level Markers
All the above should be created at the outset of Revit adoption and can usually be replicated from a previous CAD system, AutoCAD or MicroStation for example – although, they must be made from scratch in Revit, not imported from CAD! This can be a good opportunity to review and update/modernize the company’s graphic standards.
The next stage of template evolution will come from the continuing use of Revit to deliver projects. Many companies will tend to work in specific areas, such as housing, education, healthcare, retail, etc. and as a result, will be producing similar information for each project. Therefore, a standard range of drawings and data will be produced for each project too. This might include General Arrangement Drawings, Finishes Drawings, Detail Packages, Furniture Layouts, Departmental Organisation Plans, Fire Strategy Drawings, etc. A standard numbering system is also likely to be assigned to each package, using the same range of numbers from job to job.
Each project will be unique and have its own variations, however, creating a template which includes all the settings needed for the standard outputs will help save time and standardize the company’s output.
A key feature for standardizing output in Revit is a view template. This captures the view settings of an existing view and allows them to be applied to multiple other views, with the option to lock them to the view template, meaning editing the template will update all the views associated with it. Having a range of view templates for standard drawing packages in the project template will give a consistent base to start with, which can be adjusted to the individual project’s needs.
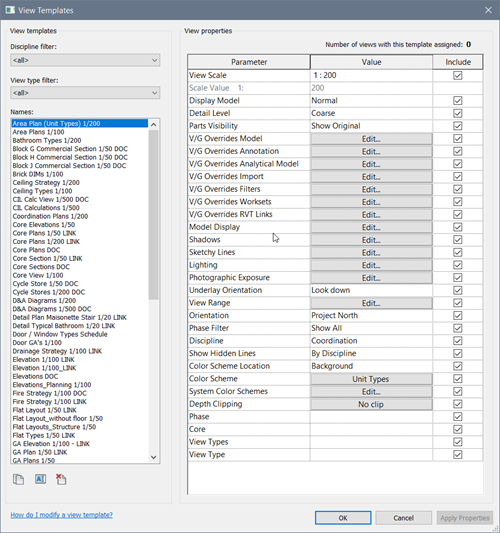
View Templates Ready for Use
Standard schedules should also be defined in a template. Rooms, Areas, Doors, Windows, Furniture, Equipment, etc. All these schedules can be configured ready for the objects to be placed in the model and again help achieve consistent outputs.
Legend Views give keys for wall types, fire rating, floor finishes, ceiling finishes, etc. can be defined. Tying these in with the filters used in the view templates helps with output standardization.
Sheets could be created for all the standard drawings you will need on a project. That way the numbers can be defined once in the template and lead to standardization of drawing issue sheets etc. Obviously, every project will have different requirements for drawings but having the main ones ready in the template can help get things underway.
Parameters and Information
The mainstay of any Revit project is the parameters and they are the key to the information in a BIM project. All objects have them, they are used for scheduling, in filters for display purposes and in tags to display information on the drawings. Therefore, having these standardized through a shared parameter file is another key topic to look at. This goes hand-in-hand with the families that will be used in the project and how many should be pre-loaded into the project template.
Firstly, define which parameters are needed for the families. This includes parametric data to drive the models as well as information from parameters for scheduling and filtering through view templates. It is preferable to use built-in parameters as much as possible, especially for scheduling information, but when custom parameters are necessary then creating them via shared parameters is favored.
There needs to be a defined naming convention for parameters. Deciding and agreeing what is meant by Width, Depth, Height, Inset, Offset, etc. If everyone understands where to apply each parameter, then we will we get consistent information in our schedules.
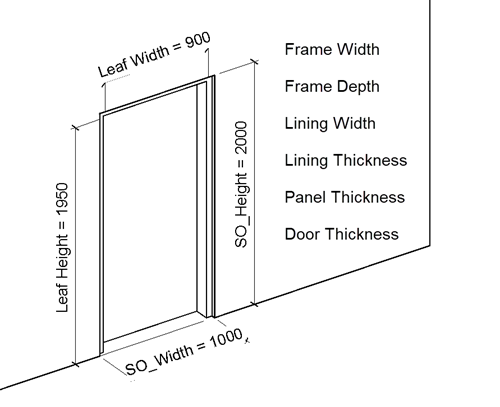
Define Standard Parameter Naming and Usage
A shared parameter file should be created in a central location for anyone creating families to access. There is often confusion about how a shared parameter works within Revit, a simple explanation is that the parameters are created and stored in the shared parameter file and imported into the families and projects as required. By importing the same parameter into multiple files, when they are brought together in a project, they will all be recognized as the same parameter in schedules and tags.
Consider any client requirements for information exchanges. COBie may be a requirement or other client specified data formats. Incorporate these into the family and project template as required. Parameter mapping between Revit parameters and COBie specific ones is a standard part of the COBie Toolkit workflow. Being aware which parameters need to be used for this and setting up the parameter mapping in the COBie toolkit ready for use on projects, will help alleviate some of the burden the information exchanges bring throughout the project.
Family Libraries
I’m often asked if there is a good library of families that can be bought, or can Symetri supply one? Unfortunately, the answer is usually no. Of course, there are Revit families out there to be downloaded, or bought from suppliers and yes, Symetri have created many family libraries for clients. But they must be created for each client from scratch to be successful, and the client needs to specify all the parametric behavior, shared parameters and graphical requirements for each family. If they’re not bespoke made to meet the client’s requirements, then they won’t react in the required way when used in a project. Without the correct shared parameters, they won’t schedule or tag properly. They may not display how we want them to at different detail levels for our drawings or react in the way required when parameters are flexed. To try and correct these issues by editing the family is likely to take longer than creating one from scratch, as first we need to understand how it has been constrained and modeled before it can be adapted to our requirements.
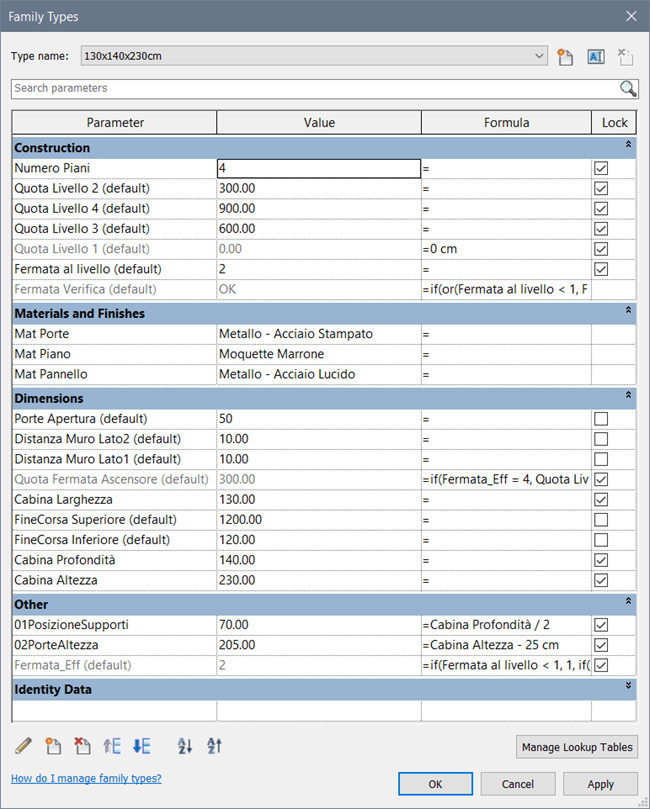
Parameters in a Downloaded Family
The best way to get started on a library of families is to create some simple ‘generic’ versions of the different families. These are good to use when starting a project as they allow for the design to be developed without having unnecessary detail complicating the design process. As the project develops, the generic families can be swapped for specific versions that suit the project. The generic families can also be used as templates to develop the project specific families when required. The detailed families developed for projects can start to populate the library for use on other projects. Hopefully, it goes without saying that standard naming conventions and storage locations must be followed to enable efficient use of the library.
The generic families should be loaded into the project template so they can be used without having to search for them. More detailed families can be loaded from the library or created as required for the specific project. A project file that contains more detailed system families should also be stored in the central library, this allows for detailed wall, ceiling, floor, roof, stair and railing types to be copied and pasted into the current project as required.
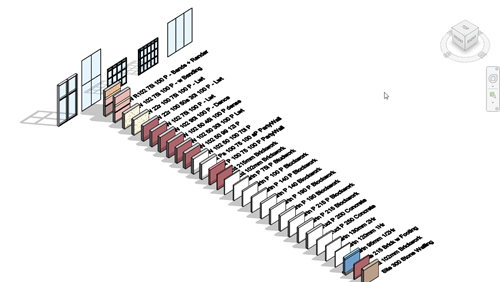
System Family Types in a Library Project
In Summary
There is a lot of effort required to get Revit up and running efficiently with good templates and family libraries. There aren’t many shortcuts either, unfortunately! It will take time and usually be developed by working on live projects, learning from that experience and feeding it back into the template for future projects. It’s important to get a good foundation to start with and to allow time in projects to create content and investigate workflows. The way a project is put together will influence all the workflows throughout the project’s life, having a good template based on proven procedures and protocols will help get the project off to a good start and save time throughout the life of the project.
Symetri can help start you off on the right path, we can provide training in template creation and family creation. These can be based on our standard training courses or as workshops to cover your specific needs. Our consultants can guide you with their experience on the proven best practice, workflows and industry standards or even create the template and families to your requirements. Get in touch for more information.


